


A clogged fertilizer spreader can be a major headache for farmers and gardeners alike. As a supplier of high - quality Fertilizer Spreader, I understand the importance of keeping your equipment in top - notch condition. In this blog, I'll share some practical tips on how to fix a clogged fertilizer spreader.
Understanding the Causes of Clogs
Before you can fix a clogged fertilizer spreader, it's essential to understand what causes the clogs in the first place. There are several common factors:
Moisture
Fertilizer is hygroscopic, which means it can absorb moisture from the air. When the fertilizer gets wet, it can clump together, forming large chunks that block the spreader's mechanisms. This is especially common in humid environments or when the fertilizer is stored in a damp place.
Incorrect Fertilizer Type
Not all fertilizers are created equal. Some fertilizers have a finer texture, while others are coarser. Using the wrong type of fertilizer for your spreader can lead to clogs. For example, a spreader designed for granular fertilizers may struggle with powdered fertilizers, which can easily stick together and block the openings.
Debris
Over time, debris such as dirt, leaves, and small stones can find their way into the spreader. This debris can accumulate and cause blockages, preventing the smooth flow of fertilizer.
Step - by - Step Guide to Fixing a Clogged Fertilizer Spreader
Step 1: Safety First
Before you start working on your fertilizer spreader, make sure it is turned off and disconnected from any power sources. Wear appropriate safety gear, including gloves and safety glasses, to protect yourself from any potential hazards.
Step 2: Empty the Spreader
The first thing you need to do is empty the remaining fertilizer from the spreader. This will make it easier to access the clogged areas. You can use a scoop or a funnel to remove the fertilizer and store it in a dry container.
Step 3: Inspect the Spreader
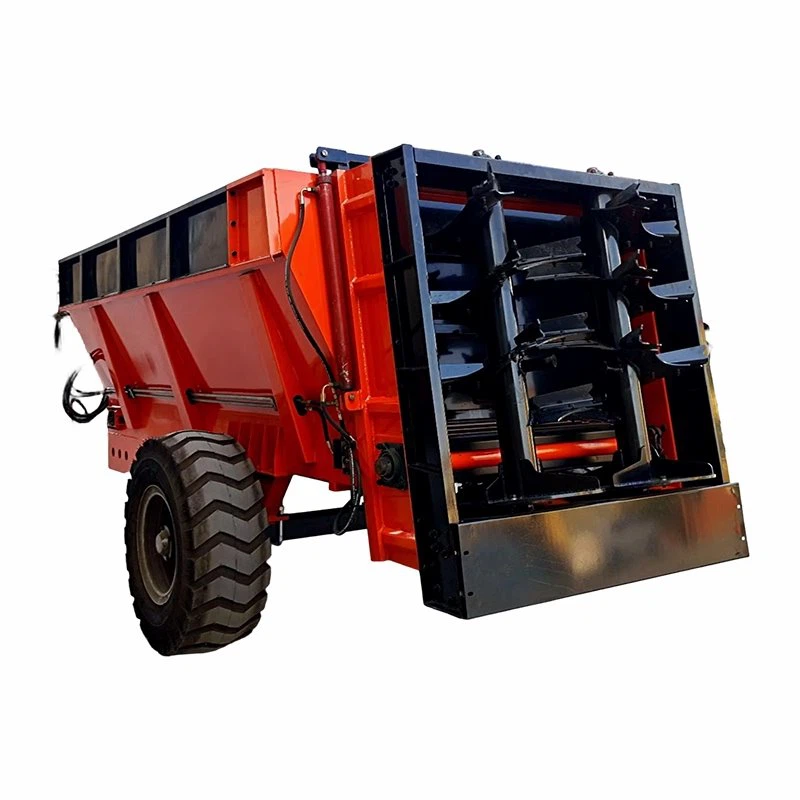
Once the spreader is empty, carefully inspect it for any visible signs of clogs. Check the hopper, the auger, the distribution mechanism, and the outlet openings. Look for any chunks of fertilizer, debris, or other blockages.
Step 4: Remove Loose Debris
Use a brush or a compressed air gun to remove any loose debris from the spreader. Pay special attention to the hard - to - reach areas, such as the corners of the hopper and the gaps between the parts.
Step 5: Break Up Clumps
If you find clumps of fertilizer in the hopper or the distribution mechanism, use a blunt object such as a wooden dowel or a plastic rod to break them up. Be careful not to damage the spreader's components while doing this.
Step 6: Clean the Auger
The auger is responsible for moving the fertilizer from the hopper to the distribution mechanism. If it is clogged, the spreader will not work properly. To clean the auger, use a wire brush or a pipe cleaner to remove any fertilizer or debris that has accumulated on it.
Step 7: Check the Outlet Openings
The outlet openings are where the fertilizer is released from the spreader. Use a thin wire or a toothpick to clear any blockages in these openings. Make sure the openings are completely clear and that the fertilizer can flow freely through them.
Step 8: Lubricate Moving Parts
After cleaning the spreader, lubricate the moving parts, such as the auger and the distribution mechanism. This will help to prevent future clogs and ensure smooth operation. Use a lubricant that is suitable for agricultural equipment.
Step 9: Test the Spreader
Once you have completed all the cleaning and maintenance steps, reassemble the spreader and test it. Add a small amount of fertilizer to the hopper and turn on the spreader. Check to see if the fertilizer is being distributed evenly and if there are any signs of clogs.
Preventive Measures to Avoid Future Clogs
Store Fertilizer Properly
To prevent moisture from causing clogs, store your fertilizer in a dry place. Use air - tight containers to keep the fertilizer fresh and free from humidity.
Use the Right Fertilizer
Make sure you are using the correct type of fertilizer for your spreader. Refer to the manufacturer's instructions to determine the appropriate fertilizer for your equipment.

Regular Maintenance
Perform regular maintenance on your fertilizer spreader to keep it in good condition. This includes cleaning the spreader after each use, inspecting it for any signs of wear or damage, and lubricating the moving parts.
Related Agricultural Equipment
In addition to fertilizer spreaders, there are other useful agricultural implements that can enhance your farming or gardening experience. For example, a Seed Machine can help you to plant seeds more efficiently, while a Hole Digger can make it easier to dig holes for planting.
Contact for Purchase and Consultation
If you are experiencing persistent problems with your fertilizer spreader or if you are interested in purchasing a new one, we are here to help. Our team of experts can provide you with professional advice and guidance on choosing the right equipment for your needs. Whether you are a small - scale gardener or a large - scale farmer, we have the products and solutions to meet your requirements. Don't hesitate to reach out to us for more information and to start a purchase negotiation.
References
- Agricultural Equipment Maintenance Handbook
- Fertilizer Spreader Manufacturer's Manuals


